Build the rack, part 3: the switch
Configuring a MikroTik CSS318 in SwOS for a VLAN home lab: the one egress rule, the VLAN table, per-port settings, snooping and the lockdown that comes last.
 Mica Voss@micavoss7 min read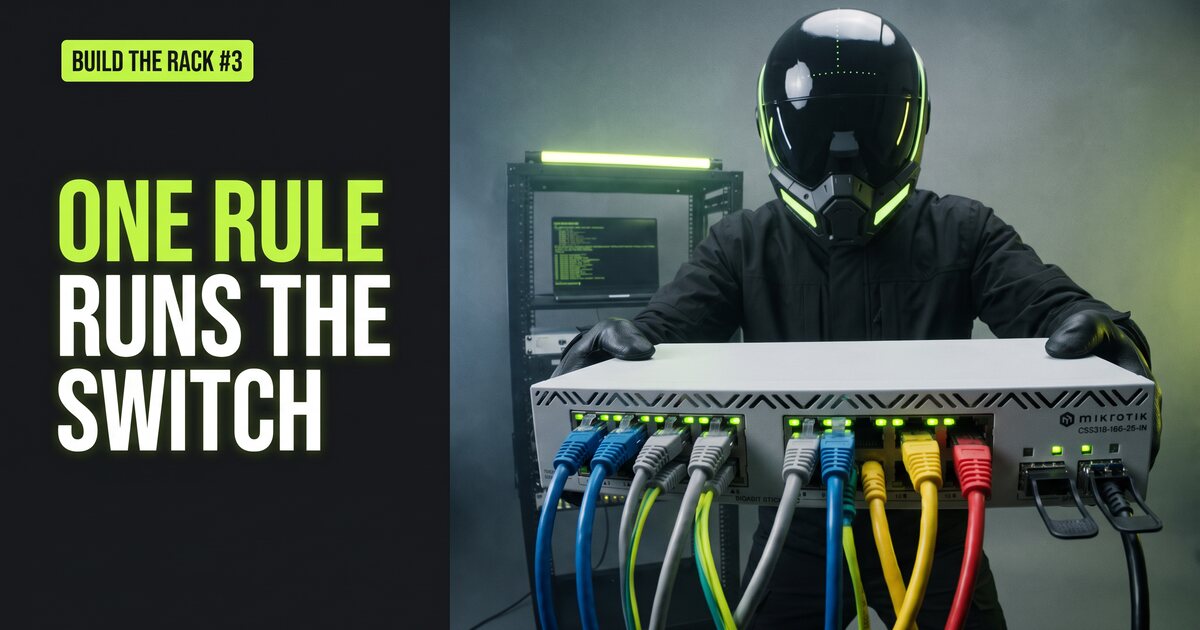
On this page
The CSS318 is a silent, fanless 16-port switch with two SFP+ cages that runs SwOS, MikroTik’s small web-only operating system. There is no command line and no configuration file; you click, and the switch does exactly what the tables say. That makes it a good first managed switch, as long as you understand one rule before you start.
The one rule
SwOS decides tagging on the way out: a frame leaves a port untagged when its VLAN equals that port’s Default VLAN ID, and tagged otherwise. Every setting in this part follows from that sentence.
- An access port for the servers network has Default VLAN ID 20 and is a member of VLAN 20 only: frames leave untagged, the device never sees a tag.
- A trunk port has Default VLAN ID 1, and VLAN 1 does not exist in the VLAN table: every VLAN leaves tagged, which is what a firewall or a hypervisor bridge expects.
- A hybrid port (the watchdog Pi) has Default VLAN ID 99 and is also a member of VLAN 10: the ISP network leaves untagged and the management network leaves tagged.
Hold on to that rule and the SwOS tabs stop looking arbitrary.
3.1 First login
Plug the laptop into port 16. Give it the static address 192.168.88.10, mask 255.255.255.0, no gateway, and open http://192.168.88.1. The user is admin with an empty password.
Upgrade first. In the Upgrade tab, choose the SwOS file you downloaded in part 1 and upgrade; the switch reboots. Then check the System tab for the version.
New CSS318 units have shipped running a preinstalled backup firmware. A trailing
pin the version and a banner that a backup version of SwOS is running mean the switch cannot save a configuration. Upgrade until both are gone before you click anything else, or you will do the whole evening twice.
Set the Identity (this build calls it switch), change the admin password to the one from your password manager, and set the system switches the plan relies on:
- Independent VLAN Lookup on. Per-VLAN IGMP snooping only works with it.
- IGMP Snooping and IGMP Querier both on. Snooping without a querier is a trap: after a few minutes the switch stops forwarding multicast, and device discovery (casting, LocalSend, the media server’s clients) breaks inside the VLANs.
- MikroTik Discovery Protocol off on every port. The address is fixed, and nothing in this rack listens for it.
- DHCP and PPPoE Snooping, trusted ports 1 and 17 only: the ISP router and the firewall. A rogue DHCP server on any other port is then dropped on the switch, before it can hand out addresses.
Click Apply All after each tab. SwOS has no DNS client, so the identity is only its discovery name; the name switch.rack.lan comes from the firewall in part 5.
3.2 The VLAN table
In the VLANs tab, add one row per VLAN of the plan and tick its members. Port 17 is a member of every VLAN because it carries them all to the firewall. Port 3 only carries what the hypervisor’s guests use.
| VLAN | Name | Members | IGMP snooping |
|---|---|---|---|
| 10 | MGMT | 3, 12, 15, 16, 17 | off |
| 20 | SERVERS | 3, 4, 5, 7, 17 | on |
| 30 | LAN | 9, 10, 11, 12, 17 | on |
| 40 | IOT | 12, 13, 17 | on |
| 50 | APPS | 3, 6, 17 | off |
| 60 | DEV | 3, 17 | off |
| 70 | VPN | 14, 17 | off |
| 80 | TV | 12, 17 | on |
| 99 | ISP | 1, 2, 8, 15, 17 | off |
VLAN 1 is deliberately absent. Apply All.
3.3 Per-port behaviour
The VLAN tab (singular) sets how each port treats tags. Every port is strict, which drops frames for VLANs the port is not a member of; the rest is the Default VLAN ID and whether the port accepts tagged frames.
| Ports | VLAN Receive | Default VLAN ID |
|---|---|---|
| 1, 2, 8 | only untagged | 99 |
| 3 (hypervisor trunk) | only untagged for now | 10 for now |
| 4, 5, 7 | only untagged | 20 |
| 6 | only untagged | 50 |
| 9, 10, 11 | only untagged | 30 |
| 12 (access point, later) | any | 30 |
| 13 | only untagged | 40 |
| 14 (the VPN port) | only untagged | 70 |
| 15 (watchdog Pi) | any | 99 |
| 16 (service port) | only untagged | 10 |
| 17 (firewall trunk) | only tagged | 1 |
| 18 (reserved) | only tagged | 1 |
Port 3 starts life as a plain access port in the management network, so the Proxmox installer in part 6 works without a tag. Once the hypervisor’s bridge is VLAN-aware, port 3 becomes only tagged with Default VLAN ID 1, the same shape as port 17. Port 18 is closed: strict mode with no memberships drops everything on it.
Apply All. The laptop on port 16 is now in VLAN 10, but the switch still answers on 192.168.88.1, because management is not restricted yet. That is on purpose.
3.4 Disable what you do not use
In the Link tab, untick Enabled on the ports you do not patch (5 and 18 in this build) and always on port 8, the emergency WAN. Name every port while you are there; the names are what make a mis-patched cable obvious in the Link tab, and they appear in the switch’s status output later.
3.5 Back up, then lock down
Save Backup in the System tab and store the file with your passwords. Then, and only then, the management lockdown:
- Address Acquisition
static, Static IP Address10.10.10.2. - Allow From
10.10.0.0/16, so the service laptop and, later, a desk PC routed in by the firewall can reach it. Allow From Ports: 15, 16 and 17 only. Allow From VLAN: 10. - Apply All. The page stops responding. That is expected.
- Change the laptop to
10.10.10.250/255.255.255.0and openhttp://10.10.10.2. - Save Backup again. This is the golden configuration.
SwOS has no HTTPS. That is the reason management answers only inside the management VLAN, which is otherwise reachable only through the firewall; which PCs may manage the switch becomes a firewall rule in part 4, not a switch setting.
The lockdown is last because every step before it can be undone from the laptop on port 16. After it, a wrong Allow From means a reset to factory defaults and the backup file. Doing it once, at the end, with a backup in hand, is the whole trick.
Checkpoint: the switch answers at 10.10.10.2 from port 16 and nowhere else. Now patch the ISP router into port 1.
The switch as a file
SwOS has no configuration format: the Save Backup file is an opaque binary only the switch can read. For a switch you want to reproduce or audit, that is unsatisfying. This build keeps the configuration above as a YAML file as well, and applies it through MikroMCP, an open-source MCP server for MikroTik devices that drives the SwOS web endpoints. A dry run prints the plan per endpoint and refuses anything that would cut off the port you are connected through; the real run applies the VLAN table first, then the per-port settings, then the system switches, so the service port never loses its VLAN halfway.
ports:
  16: { name: service,  enabled: true, vlan_mode: strict, vlan_receive: only_untagged, default_vlan: 10 }
  17: { name: fw-trunk, enabled: true, vlan_mode: strict, vlan_receive: only_tagged,   default_vlan: 1 }
vlans:
  - { id: 10, name: MGMT,    members: [3, 12, 15, 16, 17] }
  - { id: 20, name: SERVERS, members: [3, 4, 5, 7, 17], igmp_snooping: true }
The tables in this part remain the reference and the click-by-hand path. The file is for the second time you build the rack, and for the drift check in part 9 that compares the running switch against it.
What can go wrong
- Multicast dies after a few minutes. Snooping on, querier off. Turn the querier on.
- A device gets an address from the wrong network. A cable is one port off. Read the Link tab, not the label.
- The switch cannot save anything. The backup firmware is running; upgrade.
- Nothing answers after the lockdown. The laptop is still on the factory address, or on the wrong port. Only 15, 16 and 17 may talk to management.
Part 4 installs OPNsense on the firewall Tiny and turns the VLAN table into interfaces, DHCP scopes and rules. The whole series, with the parts published so far, is on the Build the rack page.
Sources
Related guides
Lenovo ThinkCentre M710q Tiny in a 10-inch rack
How the ThinkCentre M710q Tiny fits a 10-inch rack: the M910q's budget sibling on B250, no vPro, no PCIe slot, a rear Gigabit port and two 1U mounts.
MikroTik CRS310-1G-5S-4S+IN in a 10-inch rack
MikroTik CRS310-1G-5S-4S+IN in a 10-inch rack: four SFP+ and five SFP cages, one Gigabit port, RouterOS v7 and a 2U hex shelf placement.
MikroTik CSS610-8G-2S+IN in a 10-inch rack
The MikroTik CSS610-8G-2S+IN in a 10-inch rack: eight Gigabit ports, two SFP+ cages, SwitchOS Lite, no fan and an 11 W maximum.