NVIDIA Jetson Orin Nano Super Developer Kit in a 10-inch rack
The Jetson Orin Nano Super in a 10-inch rack: 67 TOPS of edge AI, 8 GB of LPDDR5, NVMe over M.2 and a 19 V supply on a 1U shelf.
On this page
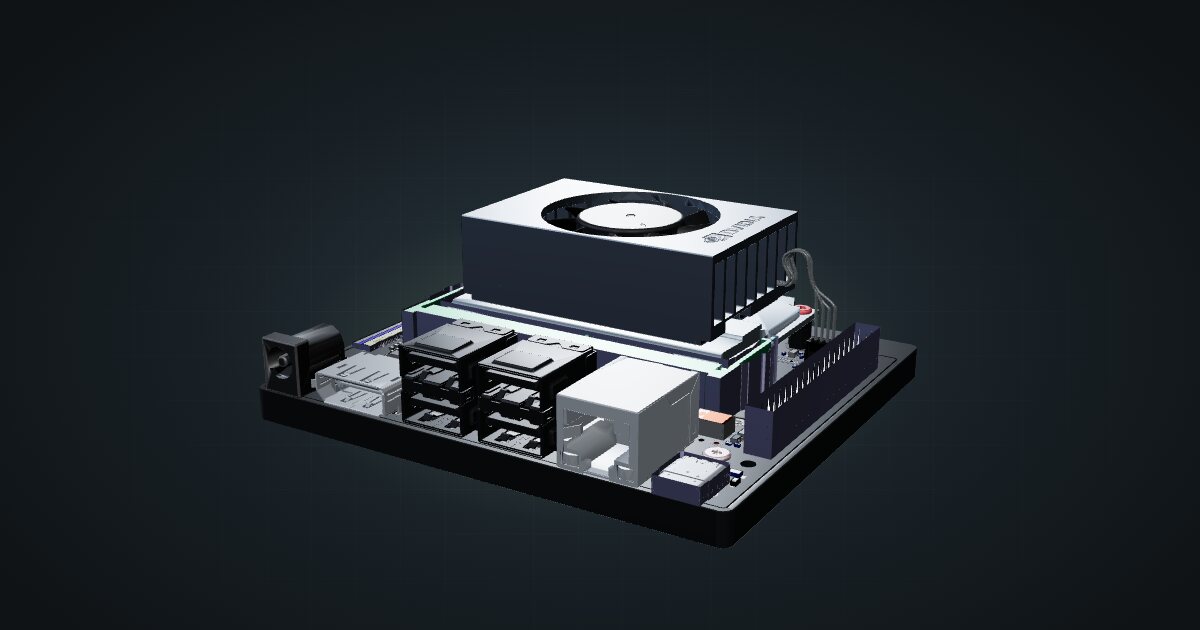
The Jetson Orin Nano Super Developer Kit is NVIDIA’s small edge-AI computer: a six-core Arm CPU and an Ampere GPU on a carrier board, with its own heatsink and fan. It suits computer-vision projects, robotics development and anyone who wants CUDA in a mini rack without building a GPU server. It is a developer kit, so expect to plan storage, power and placement yourself.
At a glance
| CPU | 6-core Arm Cortex-A78AE v8.2 64-bit |
| GPU | NVIDIA Ampere, 1024 CUDA cores, 32 Tensor cores |
| AI performance | 67 TOPS (INT8) |
| Memory | 8 GB 128-bit LPDDR5, 102 GB/s |
| Storage | microSD boot by default; two M.2 Key M slots for NVMe |
| Networking | Gigabit Ethernet, Wi-Fi module included |
| Power | Included 19 V DC supply; 7–25 W module power modes |
Where it fits in a mini rack
The 67 TOPS INT8 figure and the two MIPI CSI-2 camera connectors point at the obvious job: vision at the edge. Object detection for a camera recorder, people or vehicle counting, inspection on a workbench, or a robotics stack under development all fit the kit’s profile. It also makes a compact CUDA development node, running the same toolkit as NVIDIA’s big GPUs at a size and power level a desk rack can live with.
Small language and speech models are possible too, but memory sets the ceiling. The kit has 8 GB of LPDDR5 in total, shared by the operating system, your application and the model, so think small and quantized.
What it is not: a general-purpose home server, a host for large language models, or a storage box. For always-on services a Pi or a mini PC is the simpler tool, and for large models you need a far bigger machine.
How it fits a 10-inch rack
The kit measures 103 × 90.5 × 34.77 mm, feet and heatsink included: bigger than a Pi, still small for a 10-inch rack. There is no dedicated mount for it in the catalogue, so it sits on a shelf. The configurator checks both shelf placements against every rack:
Both use the 10i hex shelf, 154 mm deep, which fits all six RackMate frames, including the 200 mm deep T0 and T1. Flat, the kit takes 1U. Upright, its 103 mm width pushes it to 3U, so flat is the obvious choice unless you have units to spare.
Lying flat, the heatsink and fan face up, so the unit directly above decides how well the kit breathes. Avoid stacking another hot device tight on top of it, and keep cables from draping over the fan.
The kit boots from microSD by default, but it has two M.2 Key M slots: 2280 PCIe 3.0 x4 and 2230 PCIe 3.0 x2. Put an NVMe SSD in the larger slot for models, datasets and camera recordings.
Power
There are two power figures, and neither is measured whole-system draw. NVIDIA’s 7–25 W power modes describe the module alone and exclude the carrier board, fan and peripherals. The included supply is a 19 V / 2.37 A adapter, which the catalogue rounds to a 45 W allowance and uses as its planning figure. The catalogue has no typical-draw figure for the complete kit.
For rack planning, budget 45 W per kit and decide where its external 19 V adapter sits, behind the shelf or on a rear power strip. NVMe drives, USB cameras and accessories draw from the same budget, so a fully loaded kit is the case to plan for, not a bare one.
Networking and cabling
The kit has one Gigabit Ethernet port, and on the shelf it faces the front of the rack. Patch it with a short cable to a front keystone or straight into a front-facing switch port in the same rack. A wireless module ships in the M.2 Key E slot, which is useful for setup, but a rack device belongs on the wire.
If the kit processes IP camera streams, all of them arrive over that single Gigabit link, so count your cameras and their bitrates before you commit. Local cameras use the CSI-2 connectors or the four USB 3.2 Type-A ports at 10 Gbps, and one DisplayPort 1.2 output covers a monitor during setup.
The USB-C port is for data and recovery mode only. It carries no video, so keep a DisplayPort cable handy for first boot if you are not working headless.
Full specifications
Plan it
Open the Jetson Orin Nano Super in the catalogue to place it on a hex shelf in your rack plan, or start from a community build that already uses it:
For the always-on services next to it, read the Raspberry Pi 5 guide. If 8 GB is not enough, the NVIDIA DGX Spark guide covers the other end of NVIDIA’s desk-sized range.
Sources
- NVIDIA Jetson Orin Nano Super Developer Kit datasheet (PDF)
- NVIDIA Jetson Orin Nano Super Developer Kit product page
- Jetson Orin Nano Developer Kit user guide: hardware specification
- Getting started with the Jetson Orin Nano Developer Kit
- Hiwonder Jetson Orin Nano kit guide
- NVIDIA Jetson Orin power modes
Related guides
Gigabyte X870I AORUS PRO ICE in a 10-inch rack
Gigabyte's X870I AORUS PRO ICE Mini-ITX board in a 10-inch rack: AM5, dual-channel DDR5, 2.5 GbE, Wi-Fi 7, shelf options and power planning.
Hardkernel ODROID-XU4 in a 10-inch rack
The Hardkernel ODROID-XU4 in a 10-inch rack: eight Arm cores, 2 GB of RAM, USB 3.0 storage, one Gigabit port and shelf-only placement.
Raspberry Pi Zero 2 W in a 10-inch rack
The Raspberry Pi Zero 2 W in a 10-inch rack: shelf-only placement, Wi-Fi as its only network, 512 MB of RAM and a micro-USB 5 V supply.